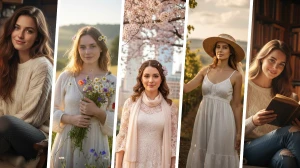
10+ Tips to Create Mind-blowing AI Images with Google Nano Banana
Creating stunning AI-generated images with Google Nano Banana has never been easier, thanks to its powerful tools and features. Whether you're crafting characters for a story or building immersive worlds for videos, these tips will help you take your AI creations to the next level. Here’s a comprehensive guide to master Nano Banana!
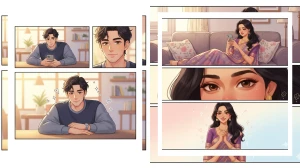
1. Build Consistent Worlds from a Single Image
Nano Banana allows you to start with a single image and expand it into an entire world. For example, if you have an image of a pilot standing beside a spacecraft, you can generate scenes like her climbing into the cockpit or resting on a crate. The key is to craft detailed prompts to maintain consistency across your world, like adding specific objects or making small changes to the scene, such as putting an oxygen mask on her inside the cockpit.
Example Prompt: “Create an image of this pilot climbing into the cockpit of the fighter jet behind her. She’s tired and weary, resting on a wooden crate beside the jet.”
This allows you to maintain a consistent look across your series of images, building an entire world from one initial shot.
2. Watermark-Free Images
If you want to generate images without the annoying watermark, you’ll need to use a platform like Open Art. After uploading your reference image, you can easily generate a clean version of the image without the watermark, allowing you to create professional-looking visuals for your projects.
Example: After uploading the pilot image, you can prompt Nano Banana: “Create a close-up of the pilot's face, looking directly at the camera.” The generated image won’t have the watermark, giving you a polished version for your project.
3. Change Backgrounds Correctly
Switching backgrounds can be tricky in Nano Banana. Instead of just adding a random background, give context and intent with your prompts. For example, instead of saying “add a jungle background,” describe the intention with something like, “create a cinematic scene with the character standing in ancient temple ruins in a lush jungle.” This will ensure the background and lighting blend well with the character, avoiding awkward mismatches.
Example Prompt: “Change the background of this character to ancient temple ruins in a lush jungle, keeping the character’s pose and location exactly the same. Add shadows and lighting to match the jungle environment.”
This makes sure the new background and lighting blend seamlessly with the character, creating a more realistic and cinematic feel.
4. Understand Segmentation Masks for Precision
Segmentation masks allow Nano Banana to understand and isolate different objects in an image. If you want to make precise edits, like changing the color of a sofa or adjusting the lighting on a character’s face, segmentation masks are key. They let you edit specific elements in the image while keeping other parts intact.
Example Prompt: “Change the white sofa to a soft blue velvet texture while keeping the rest of the image exactly the same.”
By isolating the sofa, the AI knows which elements to modify without affecting the rest of the image, ensuring clean edits.
5. Use Multiple Reference Images
Nano Banana excels at combining multiple reference images into one cohesive scene. You can mix characters or objects, such as placing two different characters into the same setting and specifying how they interact with each other. For example, you might describe how a blue-skinned man and a green-skinned woman stand across from each other in a temple ruin. The more context and details you provide in your prompt, the better the results.
Example Prompt: “The blue-skinned man and the green-skinned woman stand across from each other in front of an ancient temple, with a full moon rising in the background. They’re dressed in medieval armor and look ready for battle.”
The more context you provide, the better the result, ensuring that characters interact naturally in the scene.
6. Collage Method for Combining References
Combining too many reference images in a single scene often leads to a decrease in image quality. However, by using a collage method, where you place all references onto a single canvas, you can generate high-quality results. This technique maintains consistent lighting and pose throughout the scene, even when combining multiple characters and props.
Example: Create a collage of a blue-skinned man, a green-skinned woman, and an ancient temple, and upload this as a single reference to Nano Banana. This will help maintain consistent lighting, poses, and overall quality when combining all the references together.
7. Manage Aspect Ratios
Nano Banana uses the aspect ratio of your reference image to generate the final output. If you have a portrait image, the result will be vertical, and if you use a landscape image, the result will be horizontal. To get the right aspect ratio, ensure your reference image is in the desired format before uploading it. If you need a wider image, you can combine multiple vertical images into a single landscape reference.
Example: If you want a wide landscape image, combine two portrait images into one, like putting a full-body portrait of two characters into a landscape frame. When you upload this to Nano Banana, it will generate the image with a landscape aspect ratio.
8. Outpainting (Expanding Images)
Outpainting is a technique to expand an image’s borders and add more detail to a scene. By placing your character onto a blank canvas with white space, Nano Banana will fill in the gaps and expand the scene. This allows you to add elements or extend the background without losing focus on the original subject.
Example Prompt: “Place the character in the center of the image and expand the landscape around her, adding a vast desert with distant mountains and a setting sun.”This technique lets you increase the size of an image while keeping the focus on the original subject.
9. Use Annotated References for Precise Control
If you want full control over your generated images, use annotations. Label the elements of your reference image with arrows or text to guide Nano Banana in creating specific edits. This method allows you to place objects and characters in precise locations and makes it easier to adjust lighting and shadows according to your needs.
Example: Upload an image of your character standing in front of a blank wall. Add annotations like, “Place a dragon flying in the sky above,” or “Position an ancient stone well in the foreground.”
This gives clear instructions for where each object should appear in the final image.
10. Annotating with Images for Advanced Editing
For even more control, you can combine annotations with actual image references. By uploading images of the objects or elements you want to include (e.g., a temple, dragon, etc.), Nano Banana can use these references to generate a more accurate scene with everything in the right place. This method gives you the flexibility to dictate every detail of the generated image.
Example Prompt: “Using the uploaded reference images, place the dragon flying in the distance above the temple. Position the character in the foreground, near a stone well.”
This method gives you ultimate control over where each element in the image is placed.
11. Change the Lighting and Mood of the Scene
Lighting plays a huge role in setting the tone of an image. Nano Banana lets you change the lighting, color palette, and mood of your scene. For example, you can transform a scene from dark and ominous to warm and inviting by adjusting the lighting to a golden glow or soft sunlight. This adds emotional depth to your AI-generated images, making them even more impactful.
Example Prompt: “Change the lighting to a soft golden glow, casting shadows on the character’s face as the sun sets behind her. Keep the character and environment the same, but add a serene, warm ambiance.”
This allows you to completely transform the mood of an image, making it feel brighter or more dramatic.
12. Incorporate Logos & Text
Nano Banana excels at adding logos, text, and branding to your images. For example, you can embed a custom logo onto a vehicle or piece of equipment. You can also adjust the text style, change words, or resize them to fit seamlessly into the scene, making your images look more professional and polished.
Example Prompt: “Add the logo with the word ‘Towel’ spray-painted on the side of a futuristic rover. Ensure the lighting matches the environment.”
Nano Banana can generate realistic, branded objects that fit seamlessly into your scene.
13. Explore Different Camera Angles
Nano Banana offers the ability to manipulate camera angles within your generated images. You can create a close-up shot, change the perspective to a low angle or high angle, or even rotate the camera to get a shot from behind the character. This allows you to experiment with different viewpoints, making your scenes more dynamic and cinematic.
Example Prompt: “Generate a low-angle shot of the character, looking up at her from the ground. Make sure her boots are visible in the shot.”
Experimenting with different camera angles gives you more control over the perspective and dynamic of your images.
14. Create Seamless AI Video Transitions
One of the coolest features of Nano Banana is the ability to create AI-generated videos with seamless transitions. For instance, you can generate two separate images (one from the front and one from behind a character) and use an AI video generator to transition between the two images, creating smooth camera movements. This can be done using start and end frame techniques, where you set the initial and final frames, and Nano Banana generates the in-between frames to create a fluid video sequence.
Example: Upload an image of a character from the front and one from behind her, then use the AI video generator to create a smooth transition that rotates around her.
This technique makes it possible to create dynamic video content by connecting your AI-generated scenes with fluid camera movements.
Gemini AI Couple AI Retro Style Photo Editing Prompts Copy Paste- Try Now!
How to Create Mind-blowing AI Images with Google Nano Banana?
Here are the steps to Create Mind-blowing AI Images with Google Nano Banana:
-
Open the Google Gemini app or visit Google AI Studio, and log in with a Google account.
-
Select the “Create Image” option, often marked with a banana icon.
-
Choose how you want to work:
-
Type a creative prompt in the text box to generate a new image from scratch (e.g., “A futuristic city skyline at sunset”).
-
Or upload a photo and add a detailed prompt to transform or enhance that image (e.g., “Make this person look like an action movie hero”).
-
-
Click “Generate” or “Run.” Wait a few seconds for Nano Banana to create your AI image.
-
Review the result.
-
You can adjust and resend your prompt for further refinement or edit specific areas if needed.
-
-
Download or share your mind-blowing AI creation directly from the app or website.
ChatGPT AI Prompts Copy Paste for Creating TikTok Content Ideas- Try Now!